Gourd Growing Information
General Gourd Growing Information
Growing gourds is very much like growing squash–with some important differences. The biggest difference is that with squash and pumpkins, you harvest at a much earlier stage. Most gardeners have had the experience of finding a giant zucchini that had hidden itself away until it was a giant–tough, stringy and not very good to eat. But with gourds, tough is good. What gives trouble to most new growers, and even some veterans of the gourd patch, is knowing when to harvest and how to cure. Let’s start with what all gourds have in common. Then we’ll talk about differences in how the various types grow.
- Soil preparation: Like squash, gourds like light, well-drained soil, but will settle for less. In Carolina red clay a raised bed can help because the soil warms sooner in the spring. A soil test will show whether you need to add lime or make nutritional additions. Gourds like a pH range of 5.8-6.2.
- Gourd enemies: Gourds don’t like weeds or drought. Diseases like bacterial wilt, anthracnose and mildew strike gourds. You can control by cleanliness and eliminating disease carriers–like cucumber beetles, carriers of bacterial wilt. Read more about gourd pests and diseases by clicking HERE.
- Pollination: Each gourd vine bears male and female flowers. The male flowers appear first. You can tell the difference because female flowers have a small gourd shape beneath their petals. The first vine that grows will have more male flowers than female. Cut the vine at about 10 feet long to get more female flowers–and more gourds. Insects (and industrious gourd gardeners) carry pollen from male to female flowers. Bees have been the most frequent pollinators, but bee mites have cut local populations. Don’t kill any more by using the insecticide Sevin on blossoms, because it is hardest on bees. Other insects, even enemies like cucumber beetles and squash bugs, are frequent pollinators as well. The more pollinations, the more fruit and the more seed. Pollen can be gently transferred with an artists’ paintbrush or a cotton swab or by picking the male flower and carrying pollen to the female. Generally, the larger the gourd, the fewer you’ll get per vine: one bushel or 100 bananas, for example.
- Here is a short printable growing tips document.
Growing Hardshell Gourds
Hardshells mature in 110-130 days, so plant as soon as the soil warms in the spring. In the North Carolina Piedmont, late April through mid-June is good. Follow recommendations for planting winter squash. Too early, and your seed can rot. Too late, and the gourd will not be mature at frost.
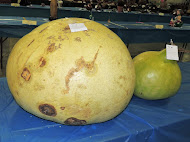
Hardshell gourd seeds are generally a heavy, ridged, shield shape. Gourds of recent African origin, like basketballs, have a black seed shaped like watermelon seed. Soaking overnight can speed germination. Starting seed indoors in peat pots can also lengthen the growing season, but gourd roots are deep and wide, so give the seedlings room. All gourds sprawl. A hardshell can grow a 100-foot-long vine in a single season. Most growers recommend spacing in hills 6 feet apart in rows at least 4 feet apart. One Guinness Book of Records gardener plants a single dipper in a 10’x10’square. Plant 4-6 seeds to a depth of about twice the length of the seed. Keep moist. Seeds typically germinate in 8-10 days, but can sprout as long as six weeks after planting. Most early growth is underground, so don’t despair if you don’t see much happening the first month or so. Black fabric mulch keeps weeds down in the expanses between the hills and raises soil temperature.
To trellis, or not to trellis is the question in the gourd patch. Trellised gourds are cleaner and easier to protect from insects. Gourd vines don’t have to be trained. They climb as naturally as monkeys. Two sturdy posts, an upper and lower wire and garden twine woven between will support heavy gourds, like birdhouses. An oversized wire cage, like a tomato cage, but larger, works for smaller gourds, like bananas. The key is how heavy the gourds are. Several dozen 10-pound bottles gets to be a strain. Your trellis can crash. A single 200-pound bushel is impossible. Your trellis will crash. Another question is what you plan to do with your gourd. Young gourds are soft and pliable. Grown on the ground, the increasing weight of the gourd causes the shape to settle so the gourd has a flat side to sit on. A trellis-grown gourd will roll around on a round bottom.
On the ground, gourd vines root at the joints, providing extra nutrition and insurance against vine borers. Slip a shingle, brick or bit of new wood (old wood brings termites) underneath and dust every few days with Sevin. Be sure to keep Sevin away from any flowers though, to protect the bees.
Growers have widely, make that wildly, different ideas about fertilizing hardshells. Some think none is best, others fertilize daily with manure tea. I sprinkle a handful of 10-10-10 in a circle around the hill when planting, so the roots will reach it when growth is well established. Everybody agrees that fertilizing after August encourages leaf growth when the gourd should be hardening.
Few pests bother hardshells. Snails and cucumber beetle larvae can kill seedlings. Adult cucumber beetles chew holes in leaves, but more important, carry bacterial wilt. Squash bugs are often abundant. Vine borers don’t seem to bother hardshells.
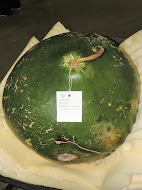
“My gourds rotted” is a common complaint from new growers. The remedy is to harvest when the gourd is mature. When the vine begins to turn brown where it meets the gourd, cut the vine two or three inches from the gourd. You can wash with either chlorine bleach or borax solutions. Handle gourds gently to prevent bruising, and put in a warm, airy place. Freezing won’t hurt a mature gourd, and you might as well get rid of others sooner rather than later. Winters where the temperature dives below freezing and stays there may hurt viability of the seed, but Carolina winters may actually increase viability. When the seeds rattle, the gourd is ready to use.
Growing Ornamental Gourds
Ornamental gourds are just as easy to grow as zucchinis. Ornamental seed looks like summer squash seed although different kinds can have different size seeds. They germinate well without soaking. Ornamentals mature in about 90 days from planting, so count backwards from when you want them to choose a planting time. In the Carolina Piedmont, a late April to early May planting will produce a crop by Independence Day, and you can celebrate by planting more for fall harvest. Plant hills about 4 feet apart in rows also 4 feet apart. Plant 3 seeds to the hill, about half an inch deep. Thin to 2 seedlings. If you are planting from a pack marked “mixed,” leave seedlings of various sizes. Different sizes often show different kinds. Growers rarely trellis ornamentals. Because they are small and light, there is no need to keep them from settling into the soil.
Fertilizing ornamentals sparks little controversy. Work about a quarter cup of 10-10-10 in a ring around the hill at planting. You can work another quarter cup of fertilizer in around the roots about 30 days after planting.
During the growing season, your main job is fighting bugs. Ornamentals suffer more damage than hardshells. Aphids (watch for ants, which are a sign of aphids), cucumber beetles, slugs and squash bugs eat ornamentals. Worst of all are squash vine borers. By the time you know they’re there, your gourd vine isn’t. Encourage root growth at joints and use Thiodan on the vine near the hill.
Harvesting at the right time is the first key to curing ornamentals. Pick too soon and the gourds rot. Pick too late and sunshine fades the bright colors. Now comes the secret: Test for maturity by gently squeezing the gourd. Start at the end of the vine where the baby gourds are and work your way back to the hill where the most mature are. If you avoid arrest for baby gourd molesting or other forms of insanity, you’ll eventually begin to notice a point where the gourd is harder. It is more shell than inside flesh. Cut it from the vine. Curing is the gradual movement of water from inside to outside. Don’t seal ornamentals. Varnishing or shellacking, as many vendors do, seals in water and dooms the gourd to rot. Polish with liquid floor wax if desired.
Growing Luffa Gourds
Luffa, the sponge gourd, benefits greatly from trellising. Grown on the ground the sponge inside is often discolored and weakened. The trellis must be sturdy to support the heavy gourds. On trellises, space luffa 2′-4′ apart. Luffas need at least 110 days to mature, so plant as soon as the soil warms up, late April in North Carolina. Pay particular attention to controlling insects when the little luffas first start growing. Terry Holdsclaw, whose generous sharing of his experience is the source of this information, says luffa vines will tell you when they need fertilizer. He says, “Healthy, mature leaves have a metallic bluish tint to them. If the leaves lose this tint, they need to be fertilized.” An application eight weeks after planting prevents loss of color. When the skin turns brown or yellow, pick. You can easily peel at this stage, although many growers wait until the luffa is totally dry and brown. Shake out the seeds and bleach the interior with chlorine bleach if you like.
Harvesting & Curing Your Gourds
by E. Conen
First thing you should know… gourds are easy!
If you’re new to growing gourds, chances are good that you have questions about when to harvest and how to cure those gorgeous globes maturing in your garden. Don’t be afraid to ask. Even experienced growers sometimes like to compare notes on this subject. Below are some tips to use for gourds in general. There is information a bit more specific to each of the three main types of gourds at the end of their respective sections above.
- So when should I harvest my gourds and bring them in to cure?
- How long does it take gourds to cure?
- Will they cure faster if I bring them into my nice, heated garage?
- Last year I grew gourds for the first time, but I had to throw them all out because they got all moldy and smelly.
- How do I tell when my gourds are finished curing?
So when should I harvest my gourds and bring them in to cure?
Simplest answer– You shouldn’t! Well, kinda… The easiest and most reliable way to cure your gourds is to just leave them on the vine and leave them alone. Gourds are perfectly happy lying in an open field or hanging from a trellis full of dead gourd vines. If you walk out every couple of weeks to check them you’ll eventually notice those birdhouse gourds that started out feeling like 7-10 lbs pumpkins will be getting considerably lighter. When fully cured they may be less than a half pound each. There are times, however, when it’s just not practical to leave your gourds in the field to cure. As you stroll through your garden, admiring your lovely crop, keep an eye out for signs of damage by critters and bugs. Deer and mice aren’t generally fond of the gourds themselves, but they are more than happy to snack on the nice seeds inside. You’ll easily spot the holes in the gourds if they’ve been helping themselves. Bugs will also be multiplying throughout the summer, and bugs gotta eat too. At least with bugs you might be able to spray something to discourage them. With deer and mice you pretty much just have to bring the gourds into a protected area to cure, but do wait until the stems have dried up first.
If you can’t just leave your gourds in the garden to cure, or don’t want to, then you should at least wait until the vine has died and dried up before harvesting. Look at the stem where it attaches to the gourd. When the vine has turned brown and dried up for at least 2-3 inches from the gourd, then you can pick them.
Whenever you do take the gourds off the vine, cut them off. Do not just pinch and twist the gourd from the vine. You’ll have a nicer, dried stem end on the gourd for when you’re crafting, and it’s easy to remove it later if you don’t want a stem on your craft project.
How long does it take gourds to cure?
That depends on the type and size of the gourd. When they are fresh and green, gourds are very heavy for their size. This is because they are almost all water inside. Water is heavy. (“A pint’s a pound the world around.” Remember that one?) Although the outside of a green gourd is smooth and slick, it is not entirely waterproof. Gradually over time the water will evaporate through the skin and stem. The bigger the gourd, the longer this will take. You can plan on anywhere from a few weeks to several months of waiting for your gourds to cure. Patience is the key.
Ornamental gourds are generally small and thin skinned. They will cure out faster than hardshells. If you cut open a dried ornamental you’ll see they have very thin shells. Hardshells, depending on the variety, generally have much thicker and stronger shells. Luffas, while quite thin skinned, can range from golf ball size to 3 or 4 feet long, again depending on the variety.
Usually, but not always, the bigger the gourd type the thicker the shell is going to be, but this is also much affected by the growing conditions. Soil type, amount of sun and rain, fertilizer, how much the vine might have been weakened by pests or sickness and how many gourds the vine had to support all affect the final size of the gourds and the thickness of their shells. I have seen Martin gourds with shells 1/8 inch thick and others of 1/4 inch or more.
Will they cure faster if I bring them into my nice, heated garage?
Not enough to put up with the smell, especially if one rots or, heaven forbid, splits and spills its guts everywhere. I promise you, a dozen gourds drying on a shelf in the dining room will not enhance the homey atmosphere at dinner time.
What best helps gourds dry is airflow. If you must bring them inside for some reason, put them in a barn, shed or garage type place with plenty of air. Laid out on a pallet, but not touching each other, is nice because the air can circulate underneath, between and over top.
Even with the best of care you’ll probably end up with a certain percentage of gourds that succumb to rot. Every week or so you’ll probably have the urge to go ‘have a look’. Since you’re there anyway, go ahead and look the gourds over and give them a gentle squeeze. If any of them start to feel soft or mushy get rid of it immediately. Once a gourd starts to rot there is nothing you can do to save it. If you let a rotting gourd stay too long it will smell bad and evetually split open and leak watery fluid everywhere. Really nasty smelling watery fluid. (Another reason to not dry them in the dining room.)
Something else you can do if you plan to cure your gourds inside is to give them a quick bath with plain water. All you want to do is remove any dirt that’s stuck to the skin. Mostly this just keeps the dirt out of your shed, but it also leaves more bare skin for the water inside to evaporate through. (It will not, however, make a significant difference in drying time.)
You really can leave your gourds in the field until they are completely dry if you want to. Many, if not most, amateur and professional growers do. They do not even need to be protected from rain. Rain will just run off the outside of the skin and they’ll continue to cure as if nothing had happened.
What you can do is check that the gourds are not lying in a low place in the garden where water might stand. That’s an invitation to rot. Just gently lift the gourd and move it up to the higher part of the garden row.
You do not need to worry about them freezing either. Maybe if you live in the far north with long, hard freezes you might get some damage, but not necessarily even then.
Last year I grew gourds for the first time, but I had to throw them all out because they got all moldy and smelly.
Awwwwww… I hate to say it, but mold is a very normal part of the curing out process for gourds. They all do it. It doesn’t hurt the gourd in the least and sometimes leaves an interesting pattern on the hardened shell that can enhance your art. (But it is yet another reason to not cure them inside the house.)
How do I tell when my gourds are finished curing?
That’s actually pretty easy. Pick one up, give it a nice squeeze, run your hand over the skin then give it a good shake.
When you picked up a very green gourd a few months ago you probably noticed how heavy it was. It probably had a ‘cool’ feel to it too, and the skin may have had a vaguely waxy smooth feel with the very slightest give to it. Actually, rather a lot like it’s cousin, Squash, in the grocery store. When a gourd is really dry it is very light and rigidly ‘hard’ feeling. The skin is smooth but not slick and has a more ‘warmish’ feel. Really more room temperature since it doesn’t have a watery interior cooling its skin through evaporation. A good shake will let you hear the dried seeds or seed ball rattling around in the interior. I mention a ‘seed ball’ because sometimes the interior will dry with the seeds all clumped together in one large ball. If that happens you’ll hear one large lump thumping dryly away inside your gourd rather than a bunch of loose seeds rattling like a Spanish maraca. Occasionally you’ll even find a gourd in which the seeds stuck to the interior surface while drying. You won’t hear anything rattle inside these when you shake them. Don’t worry about it though. All these other clues will let you know when it’s time.
Once the gourd is completely cured and dry, get one of those brass or stainless steel scrubbing pads from the grocery store (-not- the kind with soap in it), wet the outside of the gourd thoroughly with plain water and scrub away. You’ll be surprised at how easily all that mold comes off and leaves you a nice, smooth, hard shell to do your crafting on.
It’s better to not use any soap when washing your gourds. Soap residue can get left in the pores of the shell and cause adhesion problems when you paint your gourd. If you want to you can use warm water and a weak bleach solution but it really is not necessary. No, bleach will not remove any stain pattern the mold left on the gourd. I’ve tried, doesn’t work. If you do use bleach or soap, be sure to rinse the gourd very thoroughly.
Now you have a fully cured and ready to craft gourd to enjoy. Click here for the crafting section of the website and have some fun!
‘Tips on Growing Gourds’ copyright Mary Ann Rood, April 7, 1998
‘Harvesting & Curing Your Gourds copyright Edmund W. Conen III, May 30, 2009
Printable Growing Tips document copyright Judi Fleming, 2011